Lord, Save Our Soles!
Learning shoemaking for cosplay – a project log
Cosplay is one oft he most versatile hobbies I could imagine: One day, you’re a hairstylist, taming Rapunzel-length monsters of plastic hair into fantastic works of art, the next day you’re a seamstress, conquering the world of suits and some steps ahead in progress you can be found dressed in a hazmat-suit like getup to make molds and cast fantastic weaponry with resins. Just to put on an elaborate character make-up and show off your hard work on stage in a short skit which you yourself wrote and are now performing like a true professional – you absolute genius!
I think we can all give ourselves a big big pat on the shoulder for what we accomplish as hobbyists – for all the things we learnt and do and discover. And to me, it ist he true beauty of cosplay to learn and discover. I love cosplay, because it goes fantastically together with my sense of curiousity and allows me to try and learn all of those new things. And while some claim, cosplay would have hit a ceiling regarding craftmanship, I keep finding new exciting things to learn.
The latest thing I found to try is shoemaking.
Project S – a pair of boots worthy of Shin-Ra’s favourite general
I got into shoemaking while I tried finding a fitting pair of boots to use as a base fort he remake of my Sephiroth-Cosplay. The original plan was to make a pair of bootcovers. But with soles that consist of layered material and therefore are pretty characteristic, the wish to make it all from scratch kept growing. And I started researching how this could be accomplished.
Going down the rabbit hole: Pinterest
Whenever I get the idea to make a thing instead of buying it, I look it up on Pinterest. My urge to look up DIY-projects on Pinterest might be an inherent part of my nature as a female person over 30 hahaha but it has proven very useful in this case, because I found many beautiful pictures of shoemaking and maybe I fell for the WIP-beauty of them. So I looked them up, tried to find an order in them, watched tutorials on YouTube and… went to the leather salesman way too early.
How not to buy supplies for a new project
Research should be the sound base for all of your sales decisions. Trust me, it is very important you know what you want to do and how you start it and also… what all of those things are called in your native language. The moment I tried to explain what I needed, I noticed I made a huge mistake by only ever watching and reading tutorials in English. The shopkeeper, however, only knew the German terms and looked at me as if I was a complete idiot. Which I kinda was. So: Learn all the terms you need. And another friendly reminder: Plan how much cash you are willing to spend and bring the amount of cash you need. Just a little tip from the person that had to be bailed out by her girlfriend for wanting to purchase more than she brought in cash lmao. Also let’s be honest: I exceeded my budget by 100%. And I can only hope it’s worth it… So – don’t be me, plan ahead!
Actual WIP
Disclaimer for those who skipped to this point: I am not a professional shoemaker. I’m just a cosplayer, bullshitting her way through an actual craftsmanship tradition/ job that takes ages to master and it might very well be that I do stuff ridiculously wrong. Sometimes on purpose (because I’m using shortcuts or don’t have the right tools), sometimes because I misunderstood something. Anyways, If you want to know how to make shoes for real, I can only recommend you to follow those who ace that discipline day by day –
Like Marcel MrSan
Patternmaking – the cosplayer way
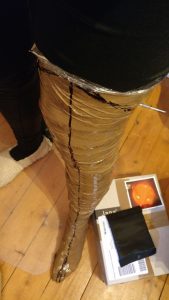
Before going material shopping, you might also want to make a pattern. Because if you have a pattern, you know how much material you need and don’t have to do weird stuff like awkwardly pointing to your thigh and explaining to a shopkeeper that you want to make a pair of boots “about that high” for “a costume”. Did I mention that I am entirely grateful for said shopkeeper being a truly “Paderbornian soul” who is so aloof and uninterested in the lives of his customers that he doesn’t ask questions? Because I surely am.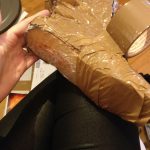
Now, my method of choice when making patterns is still the good old “wrap it in plastic wrap and tape, draw on lines where seams will go and cut it out”. However, for the boots I had to add a twist: The foot-part should not be “foot-shaped” but follow the shape of the last. Therefore I cut out the “sole” of the pattern and put in the last, wrapped it in plastic and tape again and repeated drawing on the lines for the seams.
I also made sure to draw in and cut out the part where the sole is supposed to go. Because the pattern is mainly for the upper. The sole doesn’t need a pattern and you will soon see why that is 🙂
Starting with the Insole
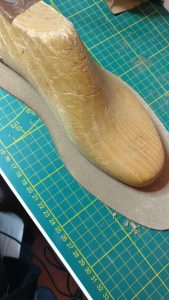
Putting the insole to the last
The whole project started to get really interesting with the insole. The insole is the part inside of your shoe that you usually don’t see but that all stuff you see is attached to. Kinda like the fundament of your shoe. I used lasts in my shoe size for it, as well as a precut leather sole that was waaay bigger than what I wanted to achieve to make it. Remember the part about not needing a pattern for the insole? We’ll get to that soon!
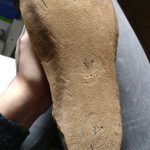
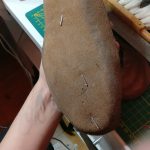
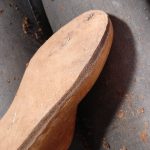
To make the insole capable of taking on glue, I scratched off the smooth leather surface with a glass shard. I never told you this project was safe! Haha. After that, I drenched the insole-to-be in water. It became flexible in an instant and I could mold it to the last. I fixed it to the last with three shoemaker nails. Then I used a hammer to mold the insole further into the shape of the last with some strategically placed hits.
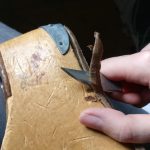
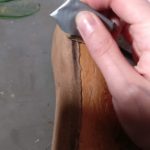
As you can see, the next thing to do was cut all of the protruding edges of the sole. A fun yet dangerous game because this knife is SHARP. Yes, in capital letters. I slipped once and cut off a patch of skin from my thumb. It didn’t even hurt bc the knife was that sharp. Also because it certainly wasn’t dangerous enough until then, you can sand the leather’s edge with a glass shard again.
Making the insole “functional”
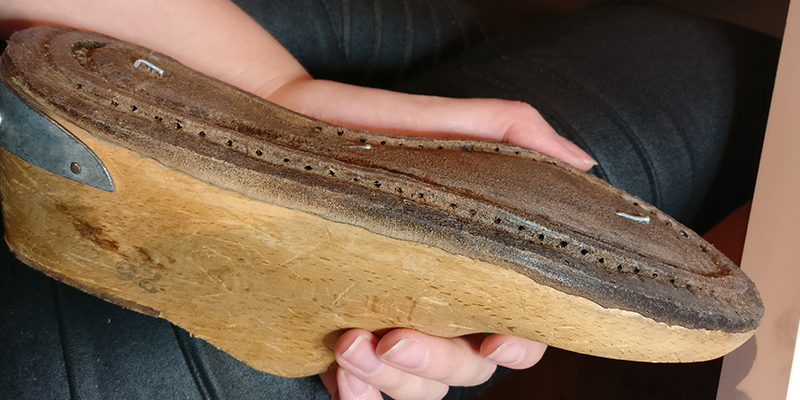
While looking into shoemaking I came across many different ways to construct a shoe and they mostly related to the way the sole was attached. It seems like the shoes we usually buy from the shelf are “cemented construction”, meaning the sole is simply glued on. That’s easy and affordable to make, however it makes the shoe only as durable as the glue and even worse, it makes the shoe really hard to resole. A sad thing, because once you have found a good pair of shoes you like, the option of resoling enables you to enjoy this pair for years and years on. Less waste, less money spent on new shoes. Resoling is a good thing. And a way of making boots and shoes resolable is the so-called “Goodyear welt”. It fixes the upper to the insole and to a welt in one stitch and said welt is sewed to the soles. Can be resoled multiple times and needs less glue for the soles – which is a good thing, given that I’m allergic to certain properties of this kind of glue. So, good reasons to go for a goodyear welt? Possibly. However I also read that it’s the most challenging one to do. And don’t we all love a good challenge?
To be continued

No responses yet